Simplifying VPN Setup - An Introduction to WireGuard Easy for Self-Hosted VPNs
It doesn't have to be a pain to self-host your own VPN. With WireGuard Easy, you'll have an incredibly simple way to securely set up and configure your very own WireGuard VPN. Here's how.
There are many reasons why you might want to host your own VPN (virtual private network), such as privacy reasons, network security, better routing, and beyond.
And the good news for you, is with WireGuard, along with WireGuard Easy, even an actual Chimpanzee could self-host their own VPN.
In fact, in this article (no Chimpanzees were harmed in the making of this article), I'll be showing you how to do just that.
But first:
What's WireGuard?
In simple terms, it's a newer, faster, and simpler VPN protocol compared to the oldies like OpenVPN and IPsec.
One of the neat things about WireGuard is its use of Cryptokey Routing. Think of it like a super-efficient system where each device on the network is recognized by its public key. This makes setting up and managing your VPN connections a breeze.
Now, the best part?
WireGuard isn't picky about platforms.
It works across various operating systems, including Linux, Windows, Android, iOS, and macOS; making it super accessible no matter what device you're on. Plus, it's open source, so tech gurus can dig into its code, making it more reliable and secure.
It's the open-source nature of WireGuard that promotes an environment for projects like WireGuard Easy to be created and improve upon the original project.
That said:
What's WireGuard Easy?
WireGuard Easy is a well-known free, and open-source WireGuard project. As the name suggests, it offers an uncomplicated method to deploy and configure a WireGuard VPN.
It turns WireGuard into an easy-to-use web application that requires practically no work in a Linux terminal at all.
Better yet: WireGuard Easy is installable and managed via Docker, which will make this process even easier.
What's Docker?
Docker is a platform that enables users to automate the deployment of applications inside lightweight containers.
This means you can run applications in isolated environments, which is perfect for setting up a VPN server like WireGuard, as it ensures consistency and minimizes conflicts with other applications.
Alrighty, now that we've covered the basics, let's get your VPN set up:
The first step to setting up your new VPN
The first step to setting up your new VPN is picking the right hosting provider for it.
Obviously, we're a bit biased, but we're going to recommend our services over at xTom. We have locations all over the world and power many well-known VPN brands.
You can find our hosting services in the following locations:
Regardless of the hosting provider you choose (if it's not us), you'll want to make sure they allow VPNs and have a location somewhat near you.
Installing Docker Compose
Once you've secured a server to install your VPN on, you're ready to continue. You can use any Linux distribution you'd like, but I always recommend Debian 12. The rest of this tutorial will be tailored to Debian/Ubuntu, but slight modifications will allow this to work for any distribution.
We'll be using Docker Compose instead of Docker for WireGuard Easy. This will allow us to create more of a persistent environment but is functionally the same as Docker.
Update the WG_HOST line with your static IP address, and then update the PASSWORD line with your desired web application password.
Then run the following command:
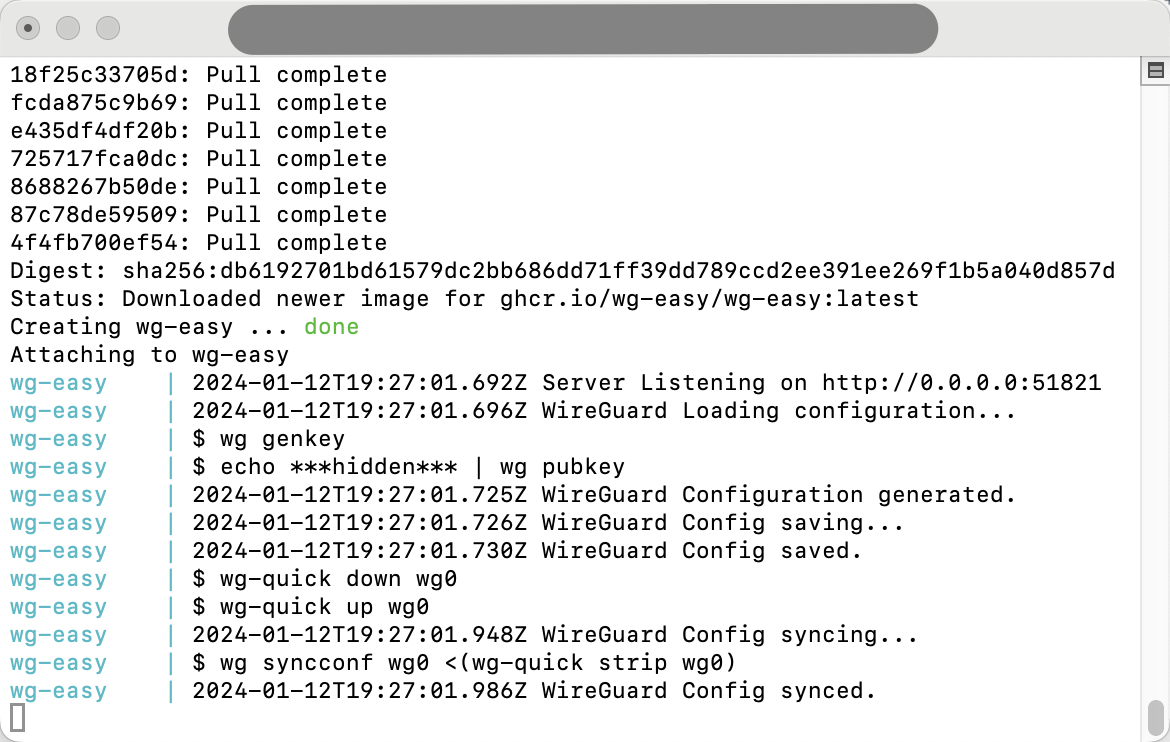
docker compose up
(Note: this command used to be "docker-compose". For V2, the correct command is "docker compose".)
You'll see that Docker will automatically install everything you need.
At the end, if it successfully finishes, you should see:
Server Listening on http://0.0.0.0:51821
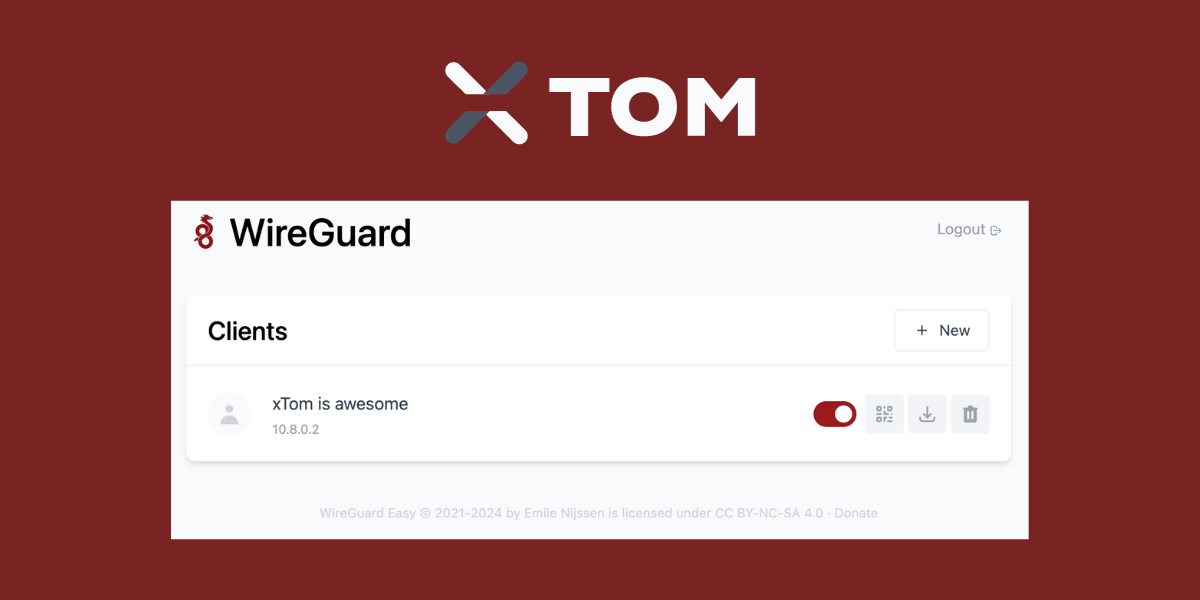
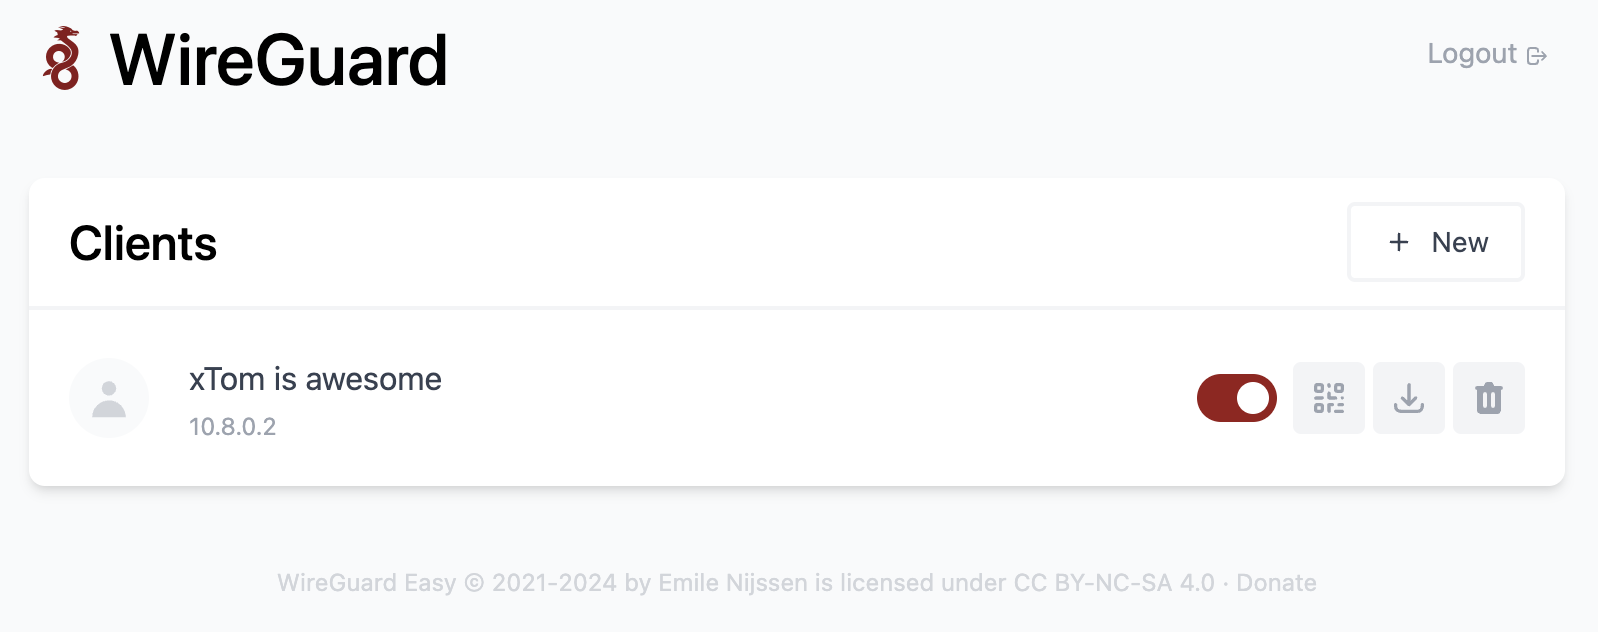
Then open up your browser, go to your IP address, and log in with your password.
You should see the WireGuard Easy administration interface, and from there all you need to do is click "New" and add as many desired clients as you'd like!
You'll just click download, and use the WireGuard configuration file with any of the available WireGuard clients, such as the ones officially available from WireGuard themselves.
(Note: for real-world use, you'll want to run WireGuard Easy in detached mode, which runs in the background. I only used "docker compose up" for demonstration purposes, you can do this by running "docker compose up -d" instead. This will also allow you to easily run other self-hosted applications on the same server.)
Yes, it's really that easy
See, I told you even a Chimpanzee could do it. You didn't believe me, did you?
I bet you do now.
Anyway, hopefully, you found this article helpful!